Showing posts with label handmade cards. Show all posts

Tuesday, 5 August 2014

Technique of the Week: Easel Cards

2014_0805-0048

Last week, I received this card for my graduation. It was made by a family friend but sent from my Nanna. While I’ve seen easel cards several times in magazines and on websites and other blogs, I hadn’t actually come across one in real life. Easel cards never really seemed my kind of style, mainly due to all the borders and peel-offs and all sorts of embellishments and images, while mine tended to use paper piecing technique and a generally simpler design.

It’s not that often that I receive handmade cards so when I do, I like to examine every detail – how did they do that? what paper was used there? I’ve never done it like that before! – and this card was no exception. While I admit, it took me far longer than it should have for me to realise how the card worked (getting it to stand up), I was inspired by the simplicity of the structure and how effective it was. Cards like this are perfect for special occasions (significant birthdays, wedding anniversaries, weddings, graduation, etc.) because they are more than just a card and become a keepsake of sorts.

2014_0805-0052

I decided to have a go at making an easel card and was surprised (although I really shouldn’t have been) at how easy it was to make. I chose to use a card blank that I already had rather than make it from card stock but all I had to do was trim it down to make it into a square blank and fold the front diagonally to make the easel. To make the front of the card, I cut a square of white card to match the size of my easel. The nice thing I found about using a card blank was that it had different colours on each side of the card and by turning the blank inside out, I could have a coloured base.

In honour of the Great British Bake Off starting tomorrow (who else is as excited as I am????), I chose to do a cupcake themed card. The papers were courtesy of 2014_0805-0057Papercraft Inspirations (of course) and fitted my theme perfectly. Another great thing about using card blanks is that they come with matching envelopes, which saves me having to root through my ever growing pile of recycled envelopes trying to find one that is both the right size and colour. Because the card blank has been trimmed, it does leave space in the envelope but this can be taken advantage of by not restricting the design of the card to the dimensions of the front – I added a little tab as a final flourish.

Having seen for myself how simple these cards are to make and having a few more special occasions coming along soon, I will no doubt be giving easel cards another go in the near future.

2014_0805-00542014_0805-00552014_0805-0056

Tuesday, 22 July 2014

Technique of the Week: Tassels

This is the first of who knows how many posts talking about the different techniques I use on my cards. My aim is to write one every week sharing either a tutorial or just some inspiration from techniques I use regularly and maybe a couple of new ones. 

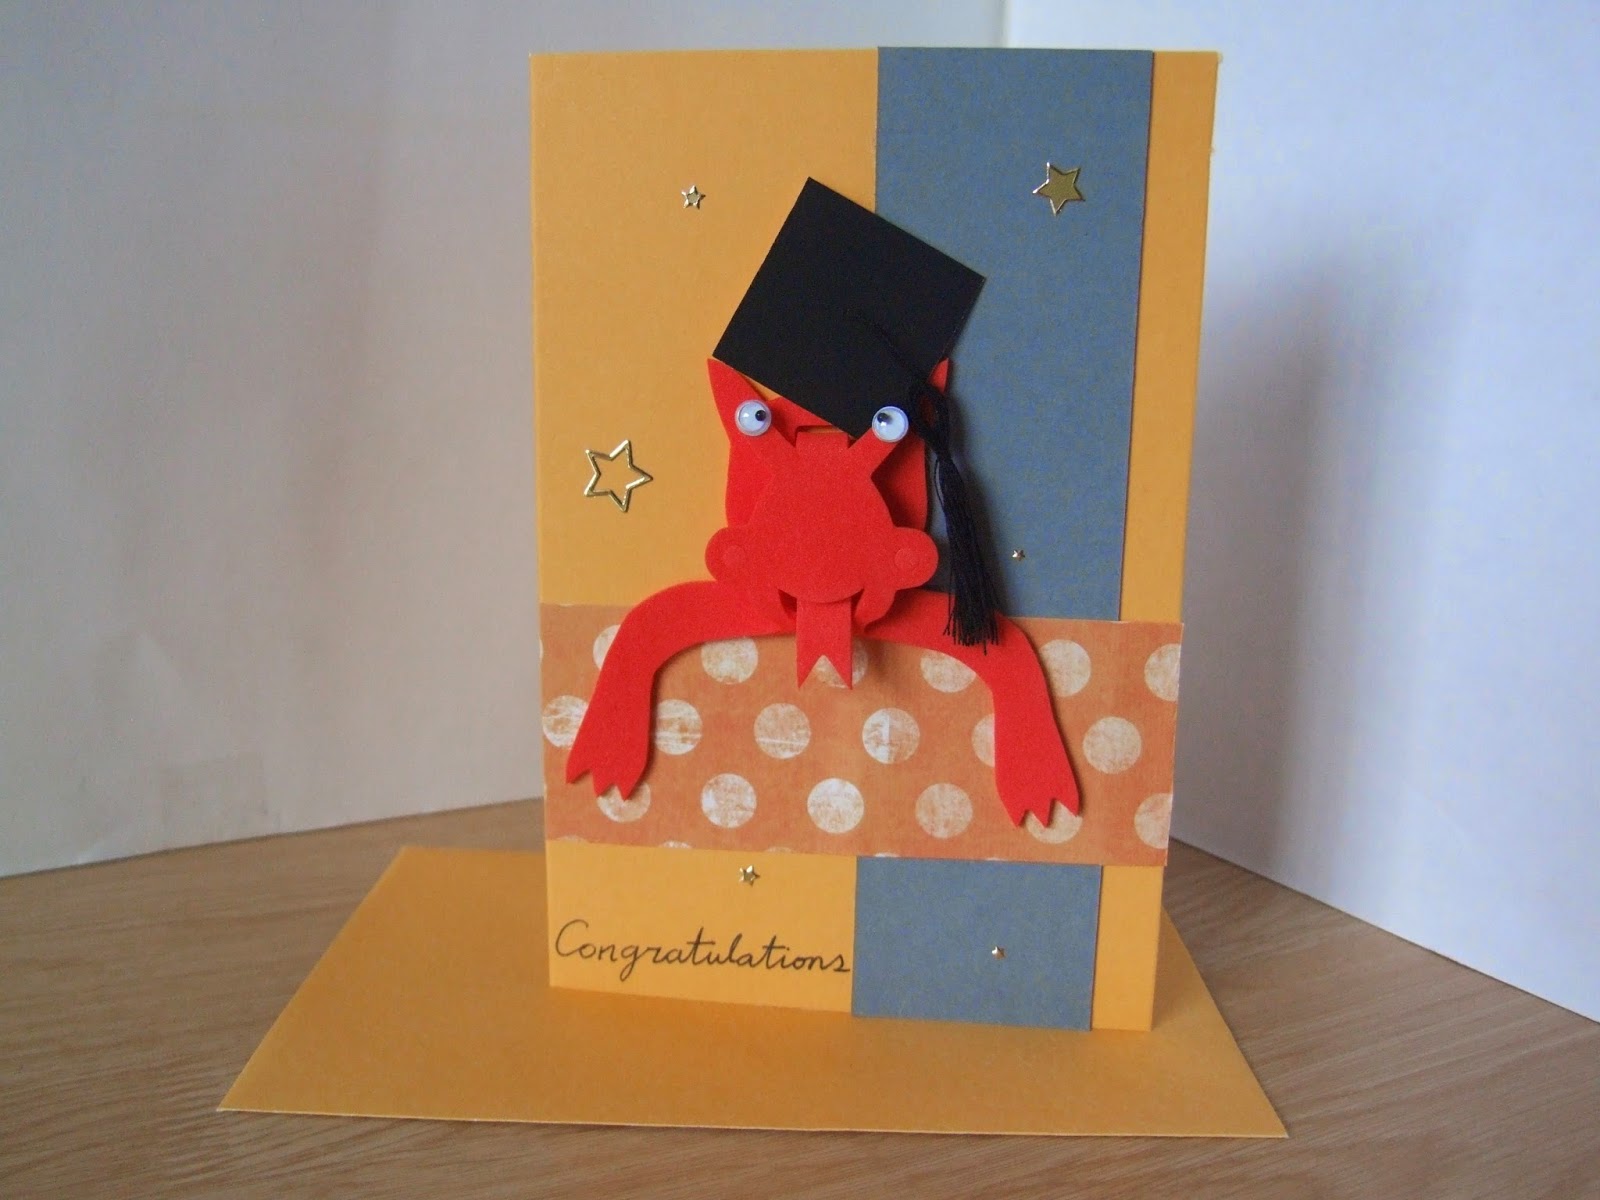
This week's technique of the week is tassels. It wasn't what I originally planned to write about but with current happenings, it seems to fit quite well. As you may have seen in my previous posts, its graduation time and yesterday it was my turn to stop being a graduand (my new word!) and become a graduate. I made a few cards for some close friends of mine who were graduating with me, which is where today's technique comes from. The tassels made would then form part of a cap embellishment to go on the front of the cards. I originally found a tutorial through Pinterest (where else!), but having used it as a starting point, I chose to make my own.

Tassels are really straightforward to make but can be fiddly depending on the size of the tassel and the length of you fingernails! (Shorted makes life so much easier I found out). All you need to make a tassel is:
  • Some thread/string/wool. I used black thread for mine as they were only going to be small but obviously, to make bigger tassels, you would use a thicker material.
  • A piece of cardboard. My tutorial uses foam board as clever me had a clear out earlier in the week and this was all I could find. Cardboard would work better but essentially you need something that is thin and stiff. The size of the cardboard will determine the size of the tassel.
  • Scissors.
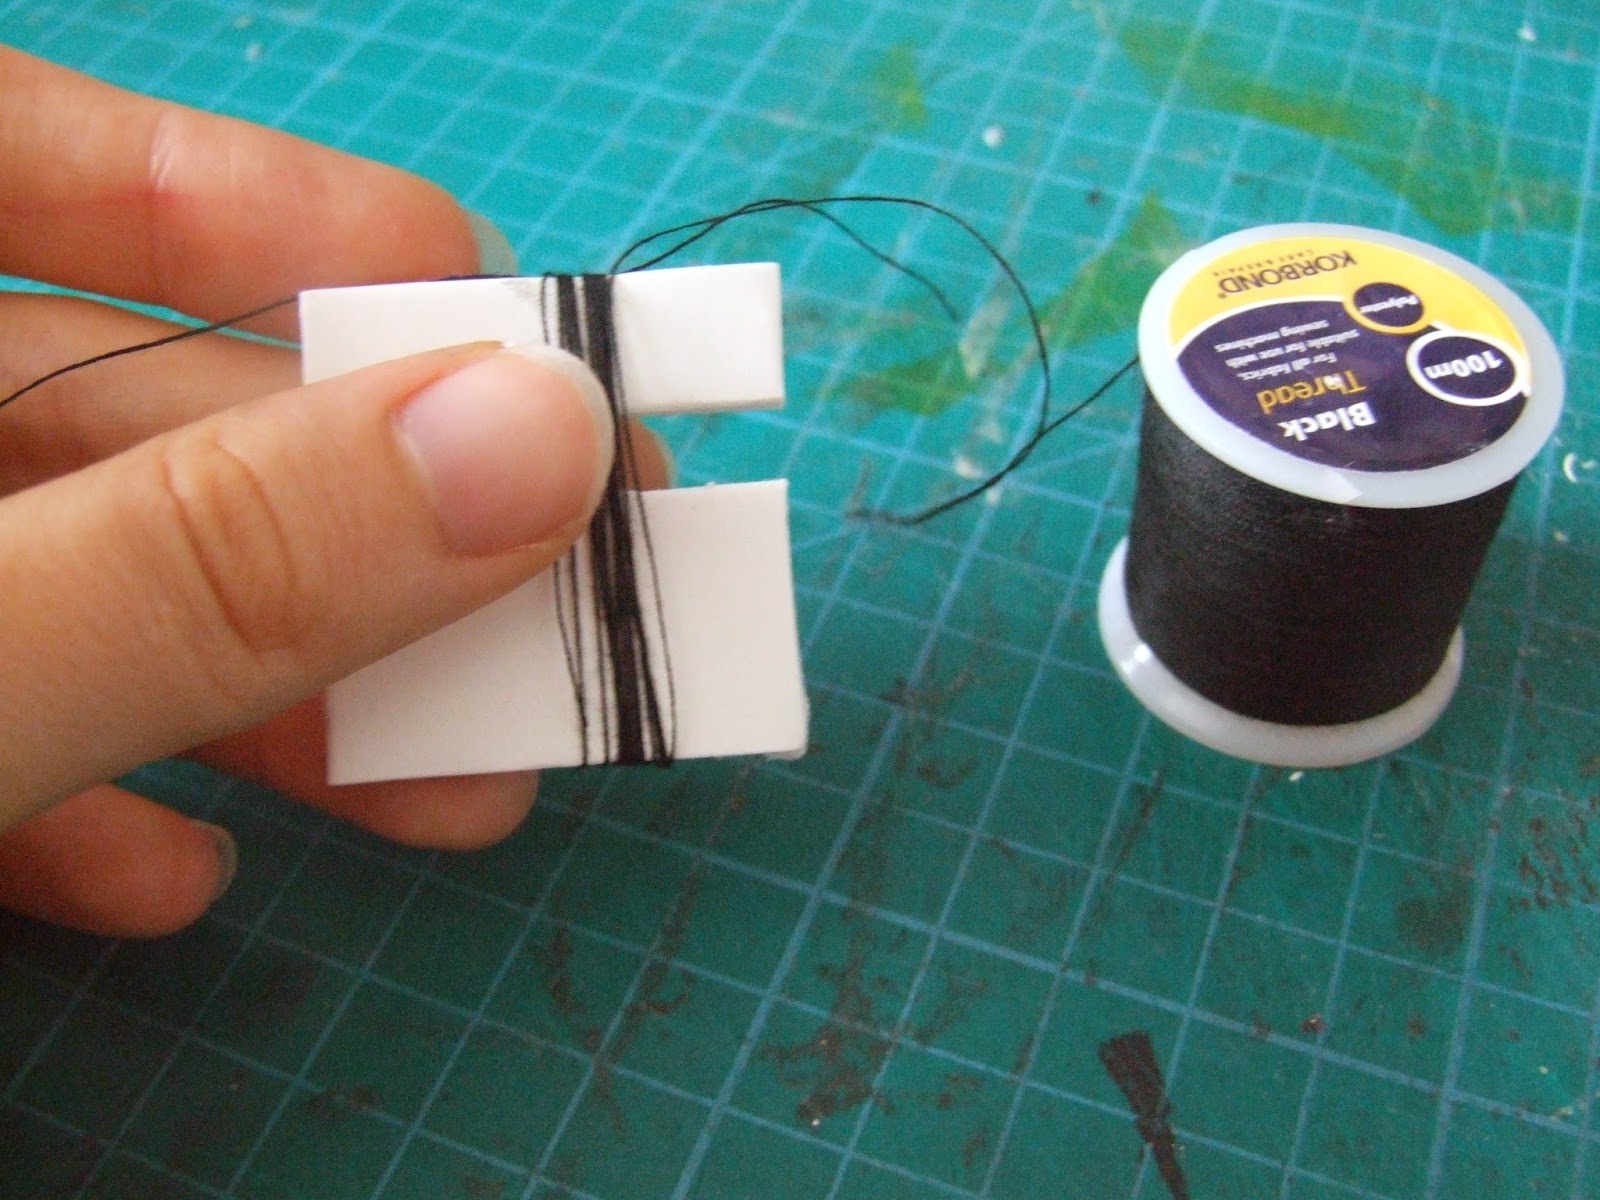
To start, cut a short length of thread and lay it across the top of the cardboard. This doesn't need to be too long but needs to be long enough so that it can be tied. The tail will also be used to attach it to the cap itself.
Next, its time to start winding. Starting at the bottom, wind the thread around the board, making sure that you wind over the piece of thread at the top. How many times you go around is up to you, for this one, I went around 20 times. Once you are back at the bottom, cut the thread from the spool.

That thread I mentioned in the first step? Tie it.
Try and make it as tight as possible. I double knotted it just to make sure.
Flip the card over and cut the thread at the bottom. This makes the tassel and also lets you remove it from the card.


This is where it can get fiddly.
The next step is to tie the middle so that it actually resembles a tassel. To do this, wrap some more thread around and knot it. I try to wrap it a couple of times before tying the knot. It can be messy when you are wrapping but once it's knotted, it's easy enough to neaten and arrange. The ends can then become part of the tassel as well once trimmed.

When attaching it to a black card cap, I threaded the tail through a needle and poked it through the centre of the cap, securing it with a bit of cello-tape and trimming the ends.


Three tassels made three caps for three cards. I chose to use my school colours as we are part of two universities. I didn't want to make three identical cards which also let me try out different ways to place the cap.

Having the owl throw it up in celebration was a very simple way to us it: the tassel doesn't need arranging or sticking down.


The second card was for a fellow Welshman, and having found this foam dragon in my stash, it was just crying out to be used. I should have however, trimmed the cap down to compensate for the foreshortening (see the third card). The other thing to remember when actually putting the cap onto a figure is to stick the tassel down - otherwise it'll get in the way! Although it would kind of fit in with this goofy looking dragon.


The third card is probably the most traditional of the three. I added a bit of glue to keep the tassel off to the side. This card was also embellished with a degree scroll. This was simply made by rolling a bit of white paper around the end of a paint brush, using glue to seal the end of the strip. To finished I used a bit of red thread to tie a bow around it and flattened the scroll slightly so that it adhered to the card front easily.


Saturday, 27 April 2013

Back in Business!

After not crafting for what seems to be a very long time, I finally got back at my craft mat and made some cards. Now that I think about it, before this week, I hadn't made any cards since before Easter - so essentially a month! Really not good!

Anyway, as I was saying, I had some cards to make this week and I because it's been so long, I think I am a little bit excitable about them this morning*. Unfortunately, I can only share one of them at the moment as the other is a commission which hasn't been sent yet so that one is coming later!

This card was inspired by the new Iron Man film that came out earlier this week. I went to see it for a friend's birthday so it only seemed appropriate that his birthday card had the same theme to it.
I used the same kind of technique that I used for my Iron Man paper pieced picture back in November - coloured card with lots of pen detail. This time however, I got my trusty white pencil out as well to add some extra details. As it was a card and not a picture, I didn't make it as 3D as last time but it made my life a lot easier! I did however make the hand more pronounced by using foam pads (I can normally never get the foreshortening right!)


Looking back at the first Iron Man I did, it's kind of interesting to see how it has evolved - I know that it entirely due to the images I based them on, but it's still in keeping with the films. I think the 'newer model' definitely an improvement and I think I will be looking into make the other Avengers in this style very soon.


*well, morning when I wrote it anyway. See, over excited about new things to publish! I've already spammed my Facebook page with the photos so I thought I should hold off just a little!

Sunday, 6 January 2013

2013: Bring It On

HAPPY NEW YEAR!

I had the week off from card making and I haven't actually made a card this year (Fear not, this will soon be amended!). I haven't been totally lazy so far this year; I've been trying to think about my resolutions and what I want to achieve this year. Having already celebrated my first Christmas, so to speak, 2013 should be pretty exciting. I will have been going 1 year in March - and to think this time last year Made by Emma only existed as a label on the back of my cards!

So, on with the resolutions:

1 - I aim to attend at least one craft fair a month. The difficulty with this is trying to find local fairs but I shall endeavour. Finding the time should be, well, I'll cope.
2 - NETWORK! After the workshop I went to back in November, I set up a LinkedIn account and I have to be honest, I still haven't really got a clue on how it works. Not that I have been on it any time recently (oops). So that is another of my targets, to meet more people and to network more.
3 - This one is more of a goal more than a target and kind of linked with the last one: to reach 300 likes on my Facebook page which technically should be do-able, considering that I have 151 in less that a year (https://www.facebook.com/madebyemmacards - in case you have forgotten! Hint hint wink wink nudge nudge). And while we're on the topic of followers/likes/etc, I'm aiming for 100+ on Twitter and 50+ on Tumblr.
4 - Attend the Manchester Entrepreneurs meetings. I found the society purely by accident and decided it would be a good idea to go along. It will make my Tuesdays unbearably long but bear it I must!
5 - Generally be (even) more productive, whilst keeping the work/study/life ratio in balance. This will, of course, include regular blog posts - I feel like there has been some neglection recently which is never good.

With those now written down (and mainly for me to refer to!), no doubt, I will think up some more to add to the list. 12 months (ish) from now, I plan on looking back at these and seeing how far I have come and whether I achieved them or not.

Is it ok to be excited about all of this?