Showing posts with label CAS-ual Fridays. Show all posts

Wednesday, 31 July 2013

CAS-ual Fridays

Now, lets see if I can remember how to do this. After starting these challenges last summer, as soon as I got back to university I didn't have time and eventually completely forgot about them. So it's high time that I got back to doing them!

cfc110


This week's challenge was to create a card which featured a number. Funnily enough, I had only this morning found out it was one of my friend's birthday today and not only that but his 21st. I always like to highlight important birthdays - making sure that an 18 or 21 etc features on the card somewhere. Therefore, I decided to make a 21st Birthday card although I have no idea when we're going to meet up next and I have no idea how to get it to him - in this case it's the thought that counts!
I am also at that age of 21st birthdays - with my own coming up in October (scary scary!) so it's probably about time that I started to get some ideas together for special cards.


With my aim to make a male card, I used my 'Masculine' papers from Dovecraft.

My first card was a bit of an accident. I cut numbers out of patterned paper to use on my 21st card but I saw how I could also use the inverse for another card. Unfortunately(?) I had the numbers the other way around so instead of 21, it's a 12 but I think it still makes for an effective birthday card. I then finished it off with some chipboard shapes (from the same range) and a stamped sentiment. 


My second card (the one I actually planned to make) used the cut out numbers from the spotty paper. I then finished it off with patterned paper strips, another chipboard circle and a stamped sentiment.

I really like how I could very easily re make this card for a different age and use different paper to make a completely different card - using floral paper and and flower instead of the circle for a girlie card.
Correct me if I'm wrong but I think I've just created my first layout! 


On a slightly different note, following on from my last post, my new craft box (still needing a name by the way!) was put through it's paces. Well, it hasn't fallen apart yet although I've decided that it needs wheels or a lazy Susan (or even both!) underneath just to finish it off. Not only was I able to reach everything easily, it also makes tidying up easy as I can just close the drawers or put the stamp back in it's box and slot it into space as soon as I am done with it which therefore means, despite just making a couple of cards, my desk is as clear (if not clearer) as it was before I started. *insert victory dance here* 

We'll see how long it takes for the novelty to wear off!

Friday, 21 September 2012

Autumnal Owls

I realise that this is my second post today but this will be my entry for this week's CAS-ual Fridays challenge.


It is, of course, the autumn equinox and starting to get colder and darker. But autumn is probably my favourite time of year, and not just because that's when my birthday falls! I love the colours and bonfire night: wrapping up warm and going out to watch all the fireworks.

My first owl card
This week's challenge, to be inspired by autumn clicked immediately with me. I have recently been going through an 'owl phase'. I love absolutely anything to do with owls at the moment: cushions, accessories, t-shirts and jumpers, I've even spotted a purse I want to get! So, I decided to make some owl inspired cards. 

I began this by creating my own style of owl and made several sketches in my design book. After that, I made myself a template and had a go at making my first owl card.


I made six of these owl cards in total, all of them different, with different colour combinations but all sticking with the autumnal reds, browns and oranges that I looking to see in the next few weeks. Using the same template was useful and made it so easy to get them fairly uniform, although cutting out 12 eyes, wings and feet got old very quickly!
I added the branches straight to the card blank, having cut them from the same paper I had used for the owls. Foam pads were used to perch the owls on the branches, to make them stand out. 
I don't normally make cards with as plain a background as these are but I think it really works well this time and if needed, there is enough room to add a sentiment without ruining it.


Saturday, 15 September 2012

Welcome back to Manchester!

I am now unpacked and back in my digs in Manchester. This summer has flown by! Whilst packing, I desperately tried to reduce the amount of craft stash to bring but it just couldn't be done. I still ended up with my caddy, several boxes and folders of stuff. *Sighs. 

However, on arrival, when I went to collect my keys, I was greeted with a parcel. Something that had been sent to me over the summer. Completely confused as to what it was, I left it until I had everything in my room before opening it. An unusual surprise turned into a very pleasant one when I opened the large envelope and found more craft stash!


It was only when I opened it that I realise it was from a prize draw I had entered in my magazine.  The goodies included GB themed papers, stickers, banners, chipboard pieces and some sequiny, really glitzy stickers all from Vintedge. Just imagine if I had won something bigger!
And the moral of that story is, you gotta be in it to win it. And it would be a better idea to send things to your home address, not university digs!

Before I left home, I had time to make a couple more cards, one as a commission and the other for a friend who was leaving for his first year at uni.
The first card had quite a specific requirement, albeit an unusual one (but I expected no less from my friend and next door neighbour). The card was for her sister's 21st birthday. She likes sheep.

I chose to make it a shaped card, and based my design on clip-art images of sheep. I loved the round body, creating a very cartoon sheep, and also making it easy to cut out but I felt it needed something a bit more than just white card. This was a sheep for goodness sake! And then it hit me . . . .

FLOCKING

No pun intended! I'm talking about the fluffy powder version of glitter. Simply cover the surface in something sticky and sprinkle. 
Like all the cards I make for landmark birthdays, I hand-wrote '21' onto the pink balloon and attached this to the sheep using white thread - it was already attached to the card at the fold. It's face and paws were simply black card with paper pieced detail. 

As well as creating it to my friend's specifications, I also added one of my own in order to fit into this weeks CAS-ual Friday challenge - Black and white plus one.


I learnt a bit from doing this card. I guess they were things that I should have known about before but never really thought about.
The first one is shaped cards: make sure it is a single shape, otherwise the card won't open fully. I should have made sure that the balloon was connected to the sheep in more ways than just the thread.
The second one is about flocking. Sticky pads DO NOT stick to flocking. Or rather, the flocking sticks to the pads alright but the the flocking comes of the card. I found this out the hard way and so had to scrape off some of the flocking from the sheep and get new pads to stick his face down. I was more careful with the feet and made sure it was attached to the paper, not the flocking. 


My second card, as I said was for a friend leaving for university. This card needs little explanation. Students. Drink. Simple. So I covered the front of my blue card blank with grey circles decorated to look like cans. I didn't want any sort of order to them and to add to this effect, I raised some on sticky pads. I finished it off with an acetate label finished with a hand written sentiment and blue ribbon. I'm really please with the sketchy look of the cans and may do this one again for a birthday.

Thursday, 30 August 2012

CAS-ual Fridays

CFC67


I realise that this post is well overdue. Especially seeing as this weeks CAS-ual Friday deadline is this evening. Oops. However, I did make my card on time. I got back from the Lake District last Friday and made my card that afternoon. However, after receiving my new project brief - with three weeks still left before I go back to university! - I was feeling very un-motivated to do any thing and nearly considered not entering at all this week.

But here it is.


So, the theme this week was Banners and Flags and as I had a friend's birthday also last Friday, I made this card with her in mind. I used a Me To You embellishment from a set I had lying around and added some matching coloured bunting made with card and ribbon. I finished it off with a swirly birthday message.

I have a surprise announcement coming up soon so keep reading. Very exciting! 

Friday, 17 August 2012

CAS-ual Fridays


I am slightly amazed that I have managed to find the time to make this card today. In a matter of hours, I am off to the Lake District for a week with my family (Really, really, really hoping the weather turns out nice as we are hiking most of the week). 

So, the theme for this week's challenge is the Sea and things seen in or by it. I have done a few sea-themed cards recently: I entered another challenge a few weeks back and of course, there is the sailing card for the Olympics. 
I made this one a really quick card by using a pre-made embellishment as the central focus of the design. These dolphins were given to me by my German room-mate last year whose family owned a craft shop. I finished the card with some blue fabricy-paper stuff and some paper ribbon. A Happy Birthday tag was added to the bottom and as an after thought, I had an experiment with some glitter glue that my sister found by creating a wave pattern up the length of the ribbon.


Friday, 10 August 2012

Card-lympics Day 15 and CAS-ual Friday

This week I have decided to cheat and do one post instead the two I would have done: one for the card-lympics and one for CAS-ual Fridays. But it isn't cheating too much as they are more or less the same card. 

So Card-lympics first

Today, the event was football and although I never really watch it, last year I caught the final of the women's World Cup (Japan vs USA) and I was hooked. So I did begin to take an interest in women's football. But anyway.
I chose to make a Digi-stamp for this card, making another character, similar to my Wimbledon girl. I had drawn the sketch for this a little while back but decided it would be perfect for this a got it sketched up, scanned and Photoshopped this morning. Instead of colouring it on the computer, however, I simply did the outline and printed the line drawing off to colour in with pencils. I would have had a go with ProMarkers but my colours are still limited.
I decorated the card with some patterned paper and added some peel-off flowers for that finishing touch.


CFC65


Card number 2.
This one had to be made using a square card blank (I wasn't going to use this as the Card-lympics card due to all my other cards being A6 and it was a bit to late to change the shape and mix it up a bit). So, I chose to use my new Digi stamp, again colouring it with pencils, and decorated the card with papers from the 'My Minds Eye' Collection. The tag was also from the papers and I decorated it with a simple peel-off message. Like my previous card, I kept the colours British but didn't want to copy the kit completely so I played around a bit.


Friday, 3 August 2012

CAS-ual Friday

cfc64


Time for blog entry 2 of 2. This weeks CAS-ual Fridays challenge was to create a card featuring things in the sky. I chose to stick to a summer theme and straight away I thought about the ELO song, Mr Blue Sky. To me, that is the ultimate summer tune and I decided I wanted that to feature on my card.
I used a bright blue card blank and left it plain, only adding the message and a single cloud with the sun peeping out from behind it. I used white texture card for the cloud and added some dimension with blue coloured pencils. This was attached to the blank with foam pads. The sun was done in a similar way, yellow card and shaded with yellow and orange pencils. I glued this instead of using foam pads.
For the sentiment, I knew I wanted a loopy font, so I went onto word and flicked through until I found it. After typing out the message, I was able to copy it directly onto the card with black pen.


Hopefully Mr Blue Sky will make his appearance at some point. It's meant to be August!

Friday, 27 July 2012

CAS-ual Fridays


This will be my first post of two today as I am starting my card making Olympics - one sport themed card a day for the duration of the Olympic games.

Anyway. Today's challenge was to use navy, aqua and green on my card. To begin with I wasn't sure exactly what I was going to do but after looking through my chipboard box, I found the perfect embellishments. 


I used some transparent shapes and navy paper to finish. The butterflies are raised on foam pads. I also decided to decorate the envelope to match by adding a strip of the same paper to one side.
Considering that before I sat at my desk, I had no idea what to do for this card, I am really pleased with the results. I hope you like it too!

Friday, 20 July 2012

CAS-ual Fridays

cfc62


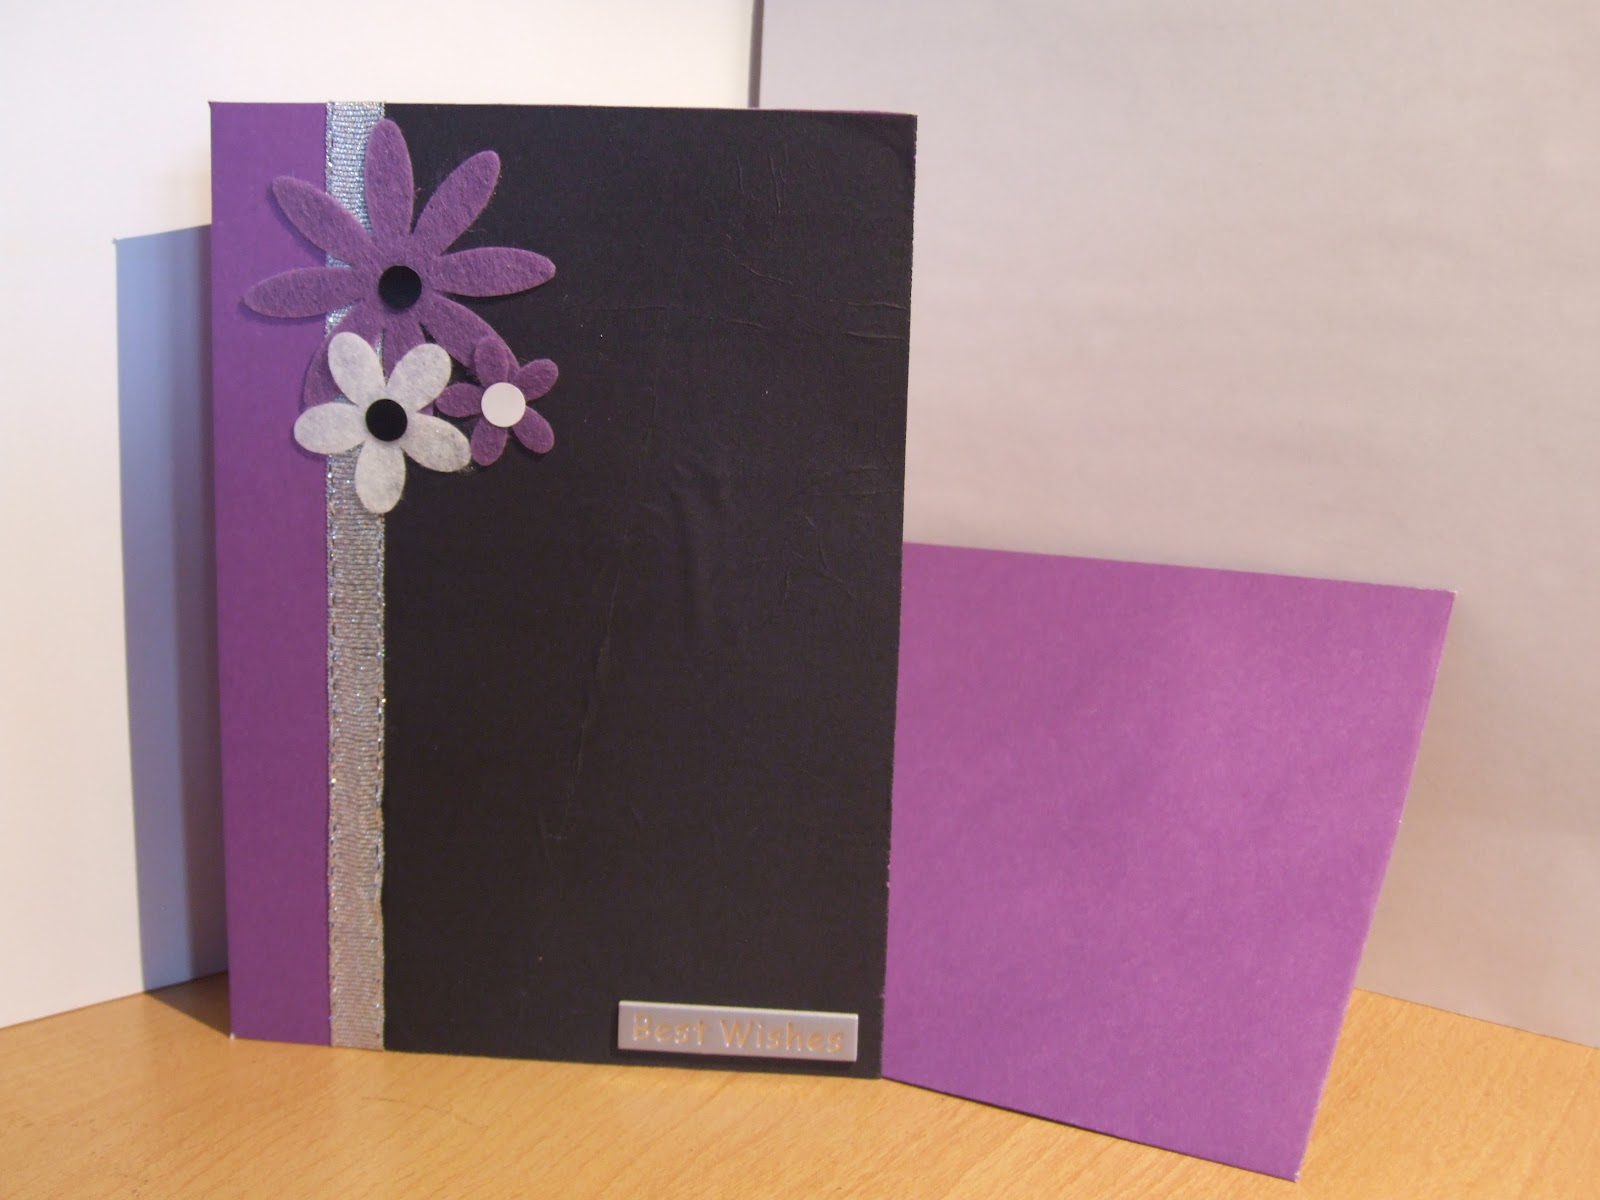
This weeks challenge was to create a card using a black card blank. This proved slightly difficult as I didn't have any but I decided to improvise. As I was (still) sorting out my room this morning, I came across some black tissue paper. I used a purple card blank but use the black tissue to cover the majority of the front, leaving a strip of purple on one edge.


I added a length of silver ribbon to hide the joint and some felt flowers finished with stickers as an embellishment. I finished the card off with a silver 'best wishes' sticker. Hope you like it!  

Saturday, 14 July 2012

CAS-ual Fridays

CFC61


Yes, it's that time of the week again. Already. My summer is  flying by far to quickly; the first CAS-ual Fridays challenge I did was the day before I left Manchester for the summer!

Anyway, this week's challenge was to create a card using strips of colour or pattern. 
I took my inspiration from the great British weather we are having at the moment(!) I kid you not, it had been raining constantly today. It's JULY. Probably doesn't help that we are currently watching le Tour and seeing all that sunny sunny weather. Rant over.

I had hoped that it would turn out slightly better than it has, now that it's completely finished it looks alright. I used strips of blue(ish) paper and card to create the rain on a grey card blank (if only the rain over here was that colourful *sigh*). I then wanted a really bold colour for the umbrella and details so I chose to used various shades of pink and red. I finished off with pen detail, a peel-off message, and a strip of ribbon.

The butterfly (probably as confused as the rest of us about the rain) was a bit of an after thought. I had recently gotten my hands on some shrink plastic shapes (thank you Papercraft Inspirations!) and I was giving them a go today. I used ProMarkers to colour in the butterfly and watched fascinated as it shrunk before my eyes in the oven. I may be using more of these in the future, if only to watch them shrink!

It seemed to fit well with the whole British Summer theme anyway. Hope you like it!

Saturday, 7 July 2012

CAS-ual Fridays

cfc60


Another quick post for this week's CAS-ual Friday challenge. I promise to do a proper proper entry next time, I will have a hell of a lot to talk about - it's the charity gig tonight and hopefully there will  be lots of cards being sold (Excited much?)


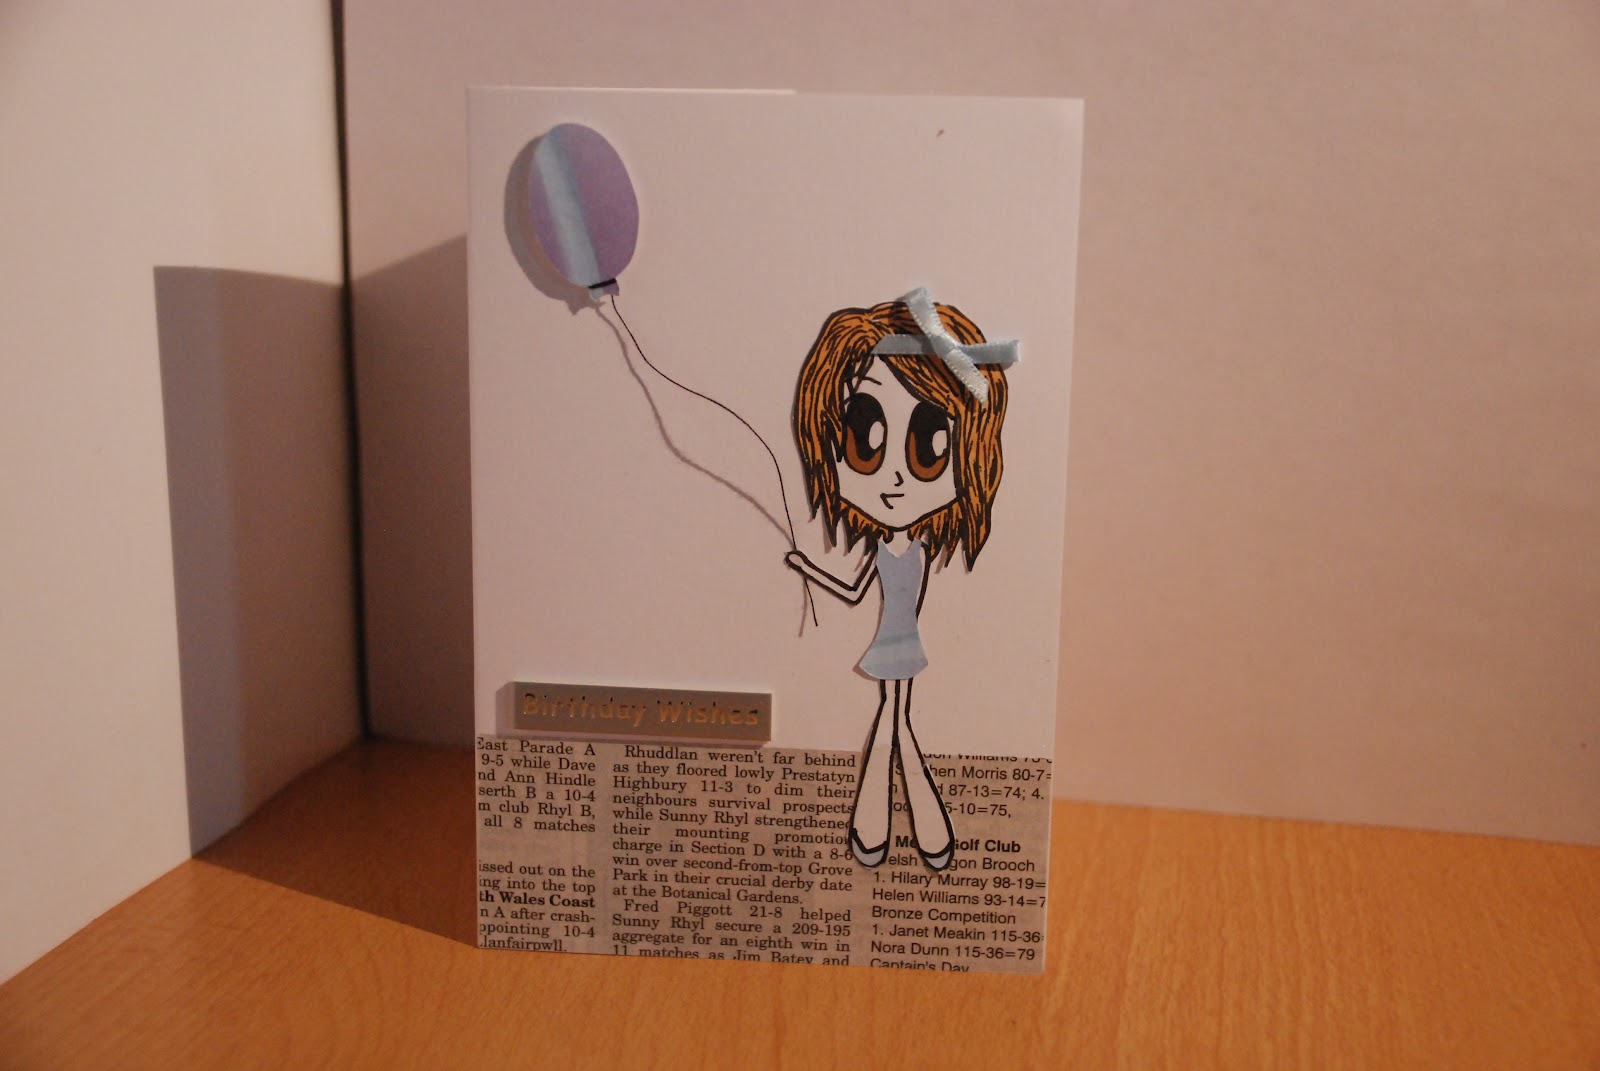
So, this week's challenge was to use text in our design. I decided to multi task for this one and make my design easy to replicate so that I could make more to sell tonight. I based my design on one that I had seen in my magazine but added my own character to really make it mine.


This one is probably my favourite (mainly due to the purple) but I created three others. I tried to make each one slightly different. Obviously, the character is the same but I made each one unique with different hair and eye colour (ProMarkers) and dresses, colour schemes and accessories (made with patterned paper, peel-offs and embellishments). The text part of my design is at the base of my card where I used strips of newspaper (unfortunately it was the sports pages, and mainly golf - I hope no one notices!). I then finished off each card with various bits and pieces. I hope you like :)


Saturday, 30 June 2012

CAS-ual Fridays

cfc59


A very quick post for this week's challenge, which was to create a card which featured two circles.

I decided to use the Retro Rose range by Laurence Llewelyn Bowen for this project. I really love the bright colours and bold patterns in this range I picked up some papers, vellum and chipboards a while back and although I have used them on a couple of occasions, I keep forgetting about them.
I finished the card off by adding a 'happy birthday' peel off.


Friday, 15 June 2012

CAS-ual Fridays

cfc57


My first entry into this crafting challenge. I've only recently found this myself. I have been reading it on another crafter's blog but only this morning found out what it stands for: Clean And Simple.

So, this week's challenge is Clear as Day: create a Clean and Simple project using vellum or acetate.


This card was made for my animal-loving Great Aunt's 80th birthday a few years back. I used acetate at the bottom of the card to make my hand written message stand out. I used My Mind's Eye Spring papers for the elephants and finished it with some pink organza ribbon to hide the join between card and acetate. The beads were a final finishing touch and kind of give it a Moroccan/African flavour.


While on the subject of acetate, after this project was a success, I had a go at creating cards for male friends using acetate. The first, I made this week for a friend at university but this inspiration came from the other one I made a last year. They were so simple to make. Using black card and papers and ribbons of different shades of blue (although any other colour would work as well) creates a bold design. Especially, as is the case with the second card, when a white card blank was used. The white shows through the acetate to give a bold contrast. 


The one thing I had to keep in mind, however, was where I wrote on the inside!